Email Marketing Tools and Techniques
How to Add a Button in Mailchimp
Maximize the impact of your Mailchimp emails by learning how to effortlessly add a button – a small detail with big potential.
When it comes to email marketing, sometimes simplicity can be the key to catching your audience's attention. Adding a button in Mailchimp might seem like a small detail, but it can make a big impact on your campaign's performance.
We'll walk you through the steps to seamlessly integrate a button into your Mailchimp emails, making it easier for your subscribers to take action.
So, let's explore how to effortlessly incorporate this often overlooked feature and elevate the effectiveness of your email marketing efforts.
Key Takeaways
- Button content blocks can be placed vertically, except in a two-column template.
- Multiple buttons can be added within a single content block by using images and linking them to their respective URLs.
- The width of the content block should be considered when creating buttons to ensure they fit comfortably.
- Understanding the HTML structure of button content blocks allows for further customization options.
Understanding Button Content Blocks
When adding button content blocks in Mailchimp, we can only place them vertically, except in a two-column template. This limitation is important to keep in mind when designing the layout of your email.
It's possible to add multiple buttons within a single content block by using images and linking them to their respective URLs. This allows for greater flexibility in the design of your email and can improve the overall user experience.
When creating these buttons, it's essential to consider the width of the content block and ensure that the buttons fit comfortably within this space. Additionally, understanding the HTML structure of button content blocks can provide further customization options, allowing for a more tailored and professional appearance.
For detailed information on how to add and customize button content blocks using images, consult Mailchimp's resources on email builders and their content blocks.
Adding Buttons to Your Layout
To add buttons to your layout, you can upload image files and link them to URLs for a visually appealing and functional design. In Mailchimp's Email Builder, you can easily incorporate call to action buttons by using the Button block.
This feature allows you to customize the button's appearance, including the border, corners, background, and text color. Additionally, you can adjust the font size and weight, or even change the font to align with your brand's style.
If you prefer to use a custom button design, you can convert the button into an image and then link it to a URL. This process involves copying and pasting HTML code to integrate the image as a clickable button within your email content. It's important to ensure that the HTML code is responsive to guarantee proper display across various devices.
For more advanced customization, you can add multiple buttons and enable Dynamic Content to personalize the displayed content based on the recipient. Whether you're creating a single, standout call to action or implementing a series of buttons for different purposes, Mailchimp provides the flexibility and tools to enhance your email layout with compelling buttons.
Editing Button Style and Settings
We can easily customize the button's appearance by selecting the Button content block and adjusting the border, corner, and background styles under Button style.
To fine-tune the button's visual presentation, we utilize html coding to set attributes such as cellpadding=0, cellspacing=0, padding-top:15px, padding-right:30px, padding-bottom:15px, and padding-left:30px.
Additionally, the href attribute is employed to specify the link destination, for example, href=http://www.mailchimp.com/blog. For enhancing the text within the button, attributes like font-weight:bold and letter-spacing:-.5px can be applied.
Furthermore, by customizing text color, font, size, weight, and alignment under Button text style, we ensure the text complements the button's appearance.
Advanced options such as title attribute and CSS class can be configured for additional styling and behavior.
On the Settings tab, we adjust the alignment and width of the button to achieve the desired layout.
Once all adjustments are made, we save the changes and close the editor to apply the button style and settings, creating a visually appealing and functional button.
Enabling Dynamic Content for Buttons
After customizing the button's appearance and settings, we can now explore the process of enabling dynamic content for buttons in Mailchimp.
- Navigate to Button Settings: In the Mailchimp editor, select the button block and locate the settings option. Within the settings, enable dynamic content to unlock personalized messaging and appearance for different recipients.
- Personalize Button Content: Once dynamic content is enabled, popular ways to add personalized content include customizing the text inside the button based on recipient data, such as their location or purchase history.
- Utilize Classic Builder: In the classic builder, take advantage of advanced styling options by adding custom padding to the button using CSS properties such as `padding-top:15px`, `padding-right:30px`, `padding-bottom:15px`, and `padding-left:30px`. This allows for precise control over the button's visual presentation.
Enabling dynamic content for buttons in Mailchimp enhances engagement and relevance in email campaigns. For further guidance on utilizing dynamic content effectively, Mailchimp's official resources or support documentation offer detailed information.
Visit [Mailchimp's official blog](http://www.mailchimp.com/blog) for more insights on optimizing dynamic content for buttons.
Exploring Related Content Blocks
In exploring related content blocks, we can leverage their versatility to enhance the engagement and relevance of our email campaigns. These blocks offer various ways to present information and drive interaction with our audience. Below is a table highlighting some of the key content blocks available in Mailchimp:
| Block Type | Description | Example |
|---|---|---|
| Image | Incorporate visuals for impact |  |
| Text | Communicate information effectively | Lorem ipsum dolor sit amet |
| Video | Engage audience with multimedia | [Watch Video](#) |
| Product Showcase | Highlight products or services | [View Showcase](#) |
| Social Share | Encourage sharing on social platforms | Share on Facebook, Twitter, LinkedIn |
Frequently Asked Questions
How Do I Add a Clickable Button in Mailchimp?
We add a clickable button in Mailchimp by dragging and dropping the Button block into the layout and typing the desired text in the Button text field.
Then, we select the Button content block and set styles for border, corners, and background under Button style.
For dynamic content, we can enable it in any block to display specific content for certain recipients.
Additionally, we can add a responsive inline button next to text in the campaign builder's Settings.
How Do I Add a Registration Button in Mailchimp?
We add a registration button in Mailchimp by following these steps:
- Drag and drop the Button block into the layout.
- Customize the button text, link, and additional options from the settings tab.
- Style and customize the button's appearance, border, text, alignment, and width.
Additionally, we can enhance the functionality of the registration button by:
- Enabling Dynamic Content to display specific content for certain recipients.
- Using the two columns layout to create a visually appealing design.
- Adding the button's HTML code to the text content block for inline buttons next to text.
How Do I Add a Share Button to Mailchimp Campaign?
Sure, we can add a share button to a Mailchimp campaign.
First, go to the campaign editor and select the content block where you want to add the share button.
Then, choose the 'Social Share' content block and customize the style and settings as needed.
You can also enable dynamic content to tailor the share button for specific recipients.
How Do I Add a Read More Button in Mailchimp?
We add a read more button in Mailchimp by dragging and dropping the Button block into the layout, typing the desired text, and selecting the link type and additional options from the drop-down menu.
We then set styles for border, corners, background, text color, font, size, weight, letter spacing, and padding.
Dynamic Content can also be enabled to display specific content for certain recipients.
For example, we recently added a read more button to our newsletter to direct subscribers to our latest blog post.
Can I Use the Same Method for Adding a Button in Mailchimp to Create a Pop-Up?
Yes, you can use the same method to create a pop-up in Mailchimp by adding a button. In Mailchimp, you can easily create a pop-up form by customizing the design and layout, and then adding a button that triggers the pop-up to appear when clicked. By following this method, you’ll be able to seamlessly integrate a pop-up into your Mailchimp email campaigns.
Conclusion
In conclusion, mastering Mailchimp's Button Content Block allows for seamless creation of captivating calls-to-action.
By adding, editing, and enabling dynamic content for buttons, users can enhance the visual appeal and functionality of their email campaigns.
Embracing the power of buttons in Mailchimp is a brilliant way to boost engagement and encourage click-throughs.
So, don't delay – dive into the dynamic world of Mailchimp buttons today!
Natali – Editor in Chief (Strategy and Mastery, AI Expert) Natali, our Editor in Chief, is the driving force behind our content’s strategic direction. With a keen eye for detail and a deep understanding of market trends, Natali ensures that our content is top-notch and strategically aligned with our client’s goals. Her expertise in AI helps to seamlessly integrate advanced technology into our marketing strategies, pushing the boundaries of conventional marketing.
Email Marketing Tools and Techniques
How to Copy a Mailchimp Campaign to Another Account
Need to duplicate a Mailchimp campaign to another account? Discover the simple solution to streamline your marketing efforts and reach a wider audience.
Have you ever hoped for a simpler method to copy a Mailchimp campaign to a different account? The great news is, such a method exists.
In this discussion, we will explore the step-by-step process of seamlessly copying a Mailchimp campaign from one account to another, allowing you to streamline your marketing efforts and reach a wider audience.
So, if you've ever wondered how to effortlessly replicate your successful campaigns, stay tuned for the simple yet effective solution.
Key Takeaways
- Export the campaign as HTML and import it into the new account.
- Customize the duplicated campaign to better suit its purpose.
- Thoroughly test and review the campaign before sending it out.
- Double-check audience settings, subject lines, and sender information before sending the duplicated campaign.
Exporting the Campaign
When exporting a Mailchimp campaign, follow these steps:
- Select the campaign from the Campaigns section.
- Click on the drop-down menu.
- Choose Export as HTML.
This action generates a file containing the HTML code of the campaign. This file can be imported into another Mailchimp account or utilized in different email marketing platforms.
However, it's important to recognize that certain styling and functionality of the campaign may not be entirely preserved during the export and import process.
Prior to importing the exported HTML into another account, it's advisable to thoroughly test the campaign to ensure proper display and expected functionality.
Upon importing the HTML into a new account, it's essential to update all links, images, and other content to ensure they're correctly directed and fully functional.
This meticulous approach is critical to ensuring a seamless transition of the copied Mailchimp campaign into another account, safeguarding the campaign's integrity and effectiveness.
Importing the Campaign to New Account

How can we efficiently import a Mailchimp campaign into a new account while preserving its content and settings seamlessly? When importing a campaign to a new account, it's essential to ensure that the original version is replicated to maintain the content and settings. Here's a breakdown of the steps to successfully import a campaign into a new account:
| Step | Description |
|---|---|
| 1. Select Campaign | Choose the campaign you want to copy from the original account. |
| 2. Export Campaign | Export the selected campaign from the original account. |
| 3. Import Campaign | Import the exported campaign file into the new account. |
Customizing the Duplicated Campaign
To enhance the duplicated campaign, consider making necessary adjustments in the email builder before finalizing the publication.
When creating a copy of an email campaign in a Mailchimp account, the replicated version is stored on the Campaigns page with the original email name followed by '(copy ##)'. In the email builder, the name of the duplicated campaign can be customized to better suit its purpose.
It's important to note that changing the campaign type of a replicated campaign isn't feasible, so it's crucial to ensure that the original type aligns with the intended use of the duplicated campaign.
Additionally, it's advisable to avoid using Social Cards with replicated campaigns, as it isn't recommended.
Testing and Reviewing the Duplicated Campaign
After duplicating a campaign, we thoroughly test all links and functionalities to ensure they function as intended in the duplicated version. This includes checking the accuracy of the content and design, verifying the audience and settings, and reviewing the tracking and reporting to ensure data is captured accurately. Sending a test email of the duplicated campaign to ourselves and colleagues helps review the appearance and functionality. Below is a table summarizing the key steps for testing and reviewing the duplicated campaign:
| Testing and Reviewing the Duplicated Campaign |
|---|
| 1. Test all links and functionalities |
| 2. Review content and design |
| 3. Check audience and settings |
Sending the Duplicated Campaign
Upon completing the thorough testing and review of the duplicated campaign, we proceed to the next step of sending it out to the intended audience. To do this, we access the duplicated campaign from the Campaigns page. If any modifications were made during the review process, ensure that all the necessary changes have been applied. Once confirmed, it's time to create a new campaign.
From the Campaigns page, select the duplicated campaign and choose the 'Re-use' option to set it up as a new campaign. Double-check the audience settings, subject lines, and sender information to ensure that they align with the intended audience and message.
Before hitting the 'Send' button, it's crucial to review the campaign one last time to ensure that it complies with all sending guidelines and best practices. Once everything is set, use the 'Send' options to distribute the duplicated campaign to the desired audience.
After the campaign has been sent, you can track its performance and engagement through Mailchimp's reporting tools. If any issues arise, Mailchimp's support team is available to assist via email and chat.
Frequently Asked Questions
How Do I Copy a Mailchimp Campaign?
We copy a Mailchimp campaign by selecting the campaign we want to duplicate, then clicking the 'Replicate' button. This creates an exact copy, including content and settings.
After making any necessary changes, we can schedule or send the replicated campaign.
It's important to note that social cards shouldn't be used with replicated campaigns.
Also, once a campaign is replicated, its type can't be changed, so we should choose the type carefully.
Can I Copy a Campaign From One Audience to Another in Mailchimp?
Yes, we can copy a campaign from one audience to another in Mailchimp. It's important to replicate the original version of the campaign to ensure seamless content and settings transfer.
However, it's not possible to change the campaign type of a duplicated campaign, so it's crucial to choose the right campaign type from the start.
Remember to avoid using Social Cards with duplicated campaigns and consider the efficiency of reusing email templates instead of duplicating entire emails.
How Do I Copy a Template From One Mailchimp Account to Another?
Copying a Mailchimp campaign to another account is a common need, but it's not supported within the platform. However, we've a workaround that involves exporting the campaign as HTML and then importing it into the other account.
This method may require some manual adjustments, but it's the best way to move a campaign between accounts.
Can I Export a Mailchimp Campaign?
Yes, we can export a Mailchimp campaign. It's a straightforward process that allows us to save a copy of a campaign and its content.
Simply go to the 'Campaigns' section, choose the campaign to export, then click 'More options' and select 'Export as HTML.'
This will save the campaign as an HTML file, which we can then import into another Mailchimp account if needed.
Conclusion
In conclusion, copying a Mailchimp campaign to another account is as easy as pie. By following the simple steps of exporting, importing, customizing, testing, and reviewing, you can successfully duplicate your campaign in no time.
So, don't be afraid to give it a go and see how it can save you time and effort in the long run. The world is your oyster when it comes to managing your email campaigns!
Natali – Editor in Chief (Strategy and Mastery, AI Expert) Natali, our Editor in Chief, is the driving force behind our content’s strategic direction. With a keen eye for detail and a deep understanding of market trends, Natali ensures that our content is top-notch and strategically aligned with our client’s goals. Her expertise in AI helps to seamlessly integrate advanced technology into our marketing strategies, pushing the boundaries of conventional marketing.
Email Marketing Tools and Techniques
How to Add Calendar Invite to Mailchimp
Never miss an opportunity to engage your audience with seamless event promotion – discover how to add calendar invites to Mailchimp in just a few steps!
Have you ever gotten an email that includes a calendar invitation, allowing you to effortlessly add an event to your agenda with a single click?
Well, what if I told you that you can do the same with your Mailchimp emails? Adding a calendar invite to your Mailchimp campaigns can elevate your event promotion game, but the process might not be as straightforward as you'd hope.
So, how exactly can you seamlessly integrate calendar invites into your Mailchimp emails? Stay tuned to discover the step-by-step process and some handy tips for making your event promotions more engaging and convenient for your audience.
Key Takeaways
- Accessing event links in Google Calendar and Outlook involves clicking on the event, selecting 'Edit event' or 'Publish Event', and then copying the event URL.
- Creating event links in Google Calendar and Outlook requires accessing the event URL and selecting 'Publish Event' or going to 'Shared Calendars' to obtain the URL.
- Adding event links to Mailchimp emails can be done using the Mailchimp AddEvent Calendar Links app, accessed through the Mailchimp Apps content block.
- Integrating Google Calendar events into Mailchimp newsletters involves creating the event in Google Calendar, obtaining the event URL, and pasting it into the designated area in Mailchimp's campaign editor.
Accessing Event Link in Google Calendar
To access the event link in Google Calendar, simply click on the event and select 'Edit event' to locate the link. Once you've done that, click the three vertical dots and select 'Publish Event' in Google Calendar to access the event link.
In the Mailchimp account, adding events to your email content is made easier with the 'Add-to-Calendar' links. In the new builder, navigate to the Content section of the campaign builder. From there, click 'Edit Design' and then insert the event URL copied from the calendar. Make sure to highlight it to create a calendar event link.
This will allow your subscribers to easily add your upcoming events to their own calendars. It's a convenient way to ensure that your audience doesn't miss out on any important dates and can easily stay informed about your events.
Accessing Event Link in Outlook
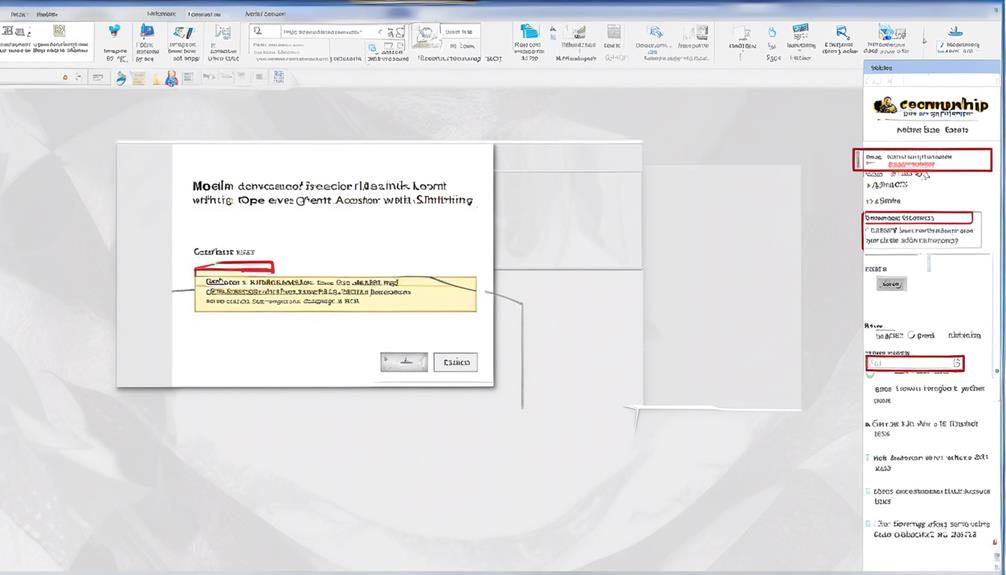
When using Outlook, we navigate to the gear icon, select 'View all Outlook settings,' choose 'Calendar,' and then access 'Shared Calendars' to obtain the event link from the 'Can view all details' section. This allows us to easily find the event link that we can then use in our emails or calendar invitations. Accessing the event link in Outlook is essential for seamlessly integrating calendar events with our Mailchimp emails.
By following these steps, we can ensure that our audience has a straightforward way to add events to their calendars and increase engagement.
Finding the event link in Outlook is a crucial step in the process of adding calendar invites to Mailchimp. By copying the URL from the 'Can view all details' section, we can effortlessly incorporate it into our email campaigns, making it easier for recipients to access and save the event to their calendars. This simple yet effective approach can help resolve any potential issues with adding events to Outlook calendars and ensure that our audience receives the necessary information to join our events.
Creating a Calendar Event Link
We can easily create a calendar event link by accessing our Google Calendar or Outlook account and obtaining the event URL from the respective platform.
In Google Calendar, simply click on the event, select 'Edit event,' and then 'Publish Event' to copy the URL.
For Outlook, click on the Settings gear icon, select 'View all Outlook settings,' go to 'Calendar,' and then 'Shared Calendars' to copy the URL from the 'Can view all details' section.
Once we have the event URL, we can proceed to add it to our marketing email using Mailchimp's AddEvent Calendar Links app.
Adding calendar event links to Mailchimp emails is a new feature that makes it easy for recipients to add events to their calendars. This feature can significantly boost event attendance and increase engagement.
By incorporating calendar event links, we provide a convenient way for customers to stay updated on upcoming events.
Help articles provided by Mailchimp have guided us through the process and made it simple to customize the event link using the link icon in the email content block.
Utilizing calendar event links in our marketing emails can enhance the overall effectiveness of our email campaigns.
Adding Calendar Links to Mailchimp Email
After obtaining the event URL from Google Calendar or Outlook, we can seamlessly integrate calendar event links into our Mailchimp emails using the AddEvent Calendar Links app. The AddEvent app allows for easy creation and insertion of calendar event links into Mailchimp campaigns. To do this, we first need to access the AddEvent app through the Mailchimp Apps content block. From there, we can create a new campaign or edit an existing one to include the calendar event link. The app provides a user-friendly interface, making it simple to find the information we need and add it to our email campaign. If any issues arise during this process, we can contact Support to resolve them, or alternatively, we can scan a help article. Mailchimp's help articles are easy to navigate and provide clear instructions on how to add calendar event links. Once the link is added, we can check out the design and ensure that everything looks as intended before sending the email.
| Pros | Cons |
|---|---|
| Easy integration | Limited customization options |
| Seamless user experience | Dependent on third-party app |
| Quick access to calendar event links | Potential for technical glitches |
Integrating Google Calendar Events Into Mailchimp Newsletter
To seamlessly integrate Google Calendar events into our Mailchimp newsletter, we can follow these steps:
- Make sure you have a Google Calendar account and have created the event you want to share.
- Obtain the event URL from Google Calendar. This can be found by clicking on the event and selecting 'More Actions,' then 'Publish Event.'
- Log in to your Mailchimp account to access the campaign you want to add the event to.
- Design an email with the new block in the design editor where you want the event link to appear.
- Paste the event URL into the designated area in the Mailchimp campaign editor.
Frequently Asked Questions
How Do I Add a Calendar Invite to a Mailchimp Campaign?
We add a calendar invite to a Mailchimp campaign by integrating Google Calendar or Outlook accounts. We locate and copy event links from these calendars to use in Mailchimp campaigns.
In the campaign builder, we create a calendar event link, edit it as needed, and insert the URL.
We can also integrate Calendly or use AddEvent Calendar Links for Mailchimp emails.
Testing, customization, and support options are available, with resources and assistance for guidance.
Does Mailchimp Have a Calendar Feature?
Yes, Mailchimp supports adding calendar events through Google Calendar and Outlook accounts.
This involves creating links within the campaign using http and https protocols and ICS (iCalendar) files support.
In Google Calendar, you can locate the event link by editing the event, selecting 'Publish Event,' and copying the URL from the 'Link to Event' field.
In Outlook, the event link can be found by navigating to Settings, selecting 'Calendar,' and copying the URL from the 'Can view all details' section under 'Shared Calendars.'
How Do I Embed a Calendar Invite?
We embed calendar invites by accessing Google Calendar or Outlook to create event links.
In Google Calendar, we click the event, select Edit event, and copy the URL from the Link to Event field.
For Outlook, we click the Settings gear icon, select View all Outlook settings, click Calendar, then Shared Calendars, and copy the URL from the Can view all details section.
These links are essential for embedding calendar invites.
Is There a Way to Add a Calendar Invite to an Email?
Yes, we can add a calendar invite to an email. It enhances user experience, boosts event attendance, and increases engagement.
By embedding event links in Mailchimp campaigns, we seamlessly integrate calendar invites. It's a simple process that involves editing the design and inserting the event URL.
Support for http, https, and ICS files is essential. Google Calendar and Outlook accounts are needed for creating events and obtaining event links.
Conclusion
In conclusion, adding calendar invites to Mailchimp is a simple process that can enhance the functionality of your email campaigns.
By integrating event links from Google Calendar and Outlook, you can provide your subscribers with a seamless way to access and add events to their own calendars.
So, why not take the leap and turn your emails into an interactive experience that will set your brand apart like a beacon in a storm?
Natali – Editor in Chief (Strategy and Mastery, AI Expert) Natali, our Editor in Chief, is the driving force behind our content’s strategic direction. With a keen eye for detail and a deep understanding of market trends, Natali ensures that our content is top-notch and strategically aligned with our client’s goals. Her expertise in AI helps to seamlessly integrate advanced technology into our marketing strategies, pushing the boundaries of conventional marketing.
Email Marketing Tools and Techniques
How to Add Mailchimp to Facebook
Yield greater engagement and reach by seamlessly integrating Mailchimp with Facebook, unlocking new possibilities for your marketing strategy.

Incorporating Mailchimp into Facebook could greatly enhance your audience engagement and outreach. Yet, have you considered the method for smoothly merging these two platforms?
Well, the process is simpler than you might think. We've got the key steps to guide you through the integration process, making it easier for you to grow your subscriber list and engage with your audience on Facebook.
So, let's unlock the potential of combining Mailchimp and Facebook to take your marketing to the next level.
Key Takeaways
- Integrating Mailchimp with Facebook can expand reach and engagement with the audience.
- It allows for the conversion of social media followers into subscribers.
- The integration increases the visibility and accessibility of offerings.
- By using targeted ads, the impact of marketing initiatives can be maximized.
Connecting Mailchimp With Facebook
To streamline our marketing efforts, we're excited to connect Mailchimp with Facebook, allowing us to reach our audience more effectively and efficiently. By integrating Mailchimp with our Facebook Page, we can expand our reach and engagement, turning social media followers into subscribers.
This seamless connection between Mailchimp and Facebook enables us to create signup forms directly on our business Page, making it convenient for our audience to subscribe to our newsletters or updates without leaving the platform.
Utilizing Mailchimp's integration with Facebook, we can strategically place signup forms on our Page, increasing the visibility and accessibility of our offerings. This not only enhances user experience but also optimizes our lead generation process.
Additionally, we can target specific audiences on Facebook and encourage them to sign up for our updates through tailored ads, further maximizing the impact of our marketing initiatives.
Adding a Signup Form on Facebook
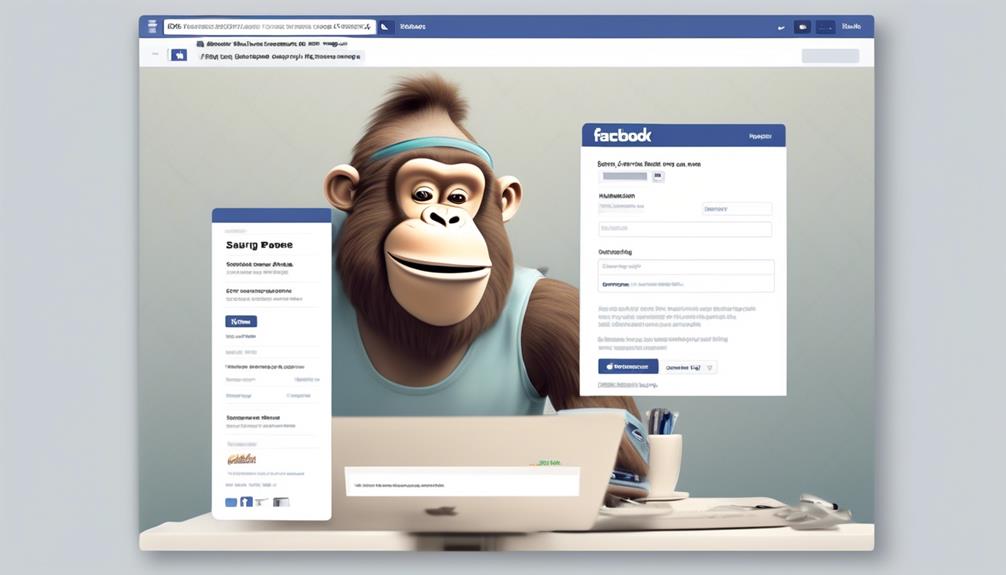
Excited to leverage the seamless integration between Mailchimp and Facebook, we can now enhance our audience engagement by strategically adding a signup form directly on our Facebook Page. To achieve this, we first need to connect Mailchimp with our Facebook Page. Once connected, we can easily add a Mailchimp signup form to our Facebook Page by following a few simple steps.
Start by navigating to the 'Signup Form' section in your Mailchimp account, and select the 'Embedded forms' option. Customize the form to align with your brand and capture the necessary information.
Next, head to your Facebook Page, click on the 'Add a Button' option, and select 'Sign Up' as the button type. Then, choose 'Link to Website' and paste the URL of your Mailchimp signup form. Save the changes, and voila – your Facebook signup form is now live and ready for visitors to subscribe!
Customizing Facebook Signup Form Themes
Customizing the Facebook signup form themes allows for personalized branding and a visually appealing experience for visitors.
When customizing the form theme, we've the flexibility to choose from two styles of signup forms that can be displayed on our Facebook Page. We can opt for the My Audiences Theme, which mirrors the Mailchimp form, or the Facebook-esque style, which may not display the Mailchimp form's header image.
Additionally, we can add a Tab label to the signup tab on the left-hand side of the Page to customize the form's visibility and label. Another important customization option is selecting the preferred form theme based on personal preference, allowing for a consistent and visually appealing signup process.
To enhance user experience, we can make adjustments to the signup tab's position by moving it towards the top of the list of tabs.
Furthermore, customizing the form theme's design and fields using the Mailchimp Form Builder enables us to create a seamless and branded signup experience for our audience.
Moving Facebook Tabs for Mailchimp Integration

Now that we've customized the Facebook signup form themes for a visually appealing experience, let's explore the strategic approach to moving Facebook tabs for Mailchimp integration, ensuring seamless accessibility for our audience.
To add a Mailchimp signup form to your business Page, navigate to the Page you want to use. Click on the 'Settings' tab, then select 'Templates and Tabs' from the drop-down menu. Look for the 'Tabs' section, and click on 'Add a Tab.'
Choose Mailchimp from the list of available tabs. Once added, you can rearrange the tabs to prioritize the Mailchimp audience by clicking and dragging the Mailchimp tab to your desired location.
By strategically placing the Mailchimp tab, you make it easier for new leads to find and join your email list, ultimately expanding your reach and engagement on Facebook.
This seamless integration ensures that your Mailchimp audience is just a click away, maximizing the potential for growing your subscriber base.
Connecting Facebook Lead Ads to Mailchimp
To streamline our marketing efforts, we'll now explore the process of connecting Facebook Lead Ads to Mailchimp, enhancing our ability to capture and nurture leads effectively. This integration is a strategic step towards optimizing our social media lead generation and email marketing processes.
Here's how to seamlessly connect Facebook Lead Ads to Mailchimp:
- Access Meta Business Tab: Go to your Meta Business Page and click on the 'Publishing Tools' tab.
- Navigate to the Forms Library: Once in the 'Publishing Tools' tab, select 'Forms Library' to manage your lead ads forms.
- Connect to Mailchimp List: If you've already connected your Mailchimp email to your Meta Business account, choose the form you want to connect and select 'Mailchimp' as the destination. Then, pick the Mailchimp List where your leads will be stored.
Frequently Asked Questions
How Do I Link Mailchimp to Facebook?
We link Mailchimp to Facebook by integrating the two platforms.
First, we navigate to the Mailchimp dashboard and select the audience we want to connect with Facebook.
Then, we click on 'Create Audience' and choose 'Facebook' as the integration option.
After that, we follow the prompts to connect to our Facebook account.
How Do I Add a Signup Form to My Facebook Page?
We can add a signup form to your Facebook page by creating a sign-up form in Mailchimp.
Then, we can use the Facebook integration feature in Mailchimp to connect the form to your Facebook page.
This integration allows visitors to sign up for your mailing list directly from your Facebook page.
By adding this feature, you can grow your subscriber list and reach a wider audience.
It's a seamless way to capture leads and expand your reach on social media.
How Do I Link My Social Media Account to Mailchimp?
We link our social media accounts to Mailchimp by accessing the Mailchimp account and clicking on the Integrations icon.
From there, we select the social media platform we want to connect, and follow the prompts to complete the integration.
Once linked, we can easily publish to our newsfeed, add signup forms, and more.
It's a seamless way to expand our reach and engage with our audience across different platforms.
How Do I Add a Newsletter to My Facebook Page?
We can seamlessly integrate a newsletter into your Facebook page, expanding your reach and engagement. With the right tools, we'll connect your Mailchimp account to your Facebook page, allowing your audience to easily access your newsletters.
This integration enhances your social media strategy and boosts your visibility. Our expertise in this area ensures a smooth and effective implementation, maximizing the impact of your newsletter on your Facebook presence.
Conclusion
So there you have it, adding Mailchimp to Facebook is a total game-changer! With just a few simple steps, you can connect with your audience in a whole new way.
From publishing to your newsfeed to adding signup forms, the possibilities are endless.
Don't miss out on this incredible opportunity to take your social media marketing to the next level.
Get started today and watch your engagement soar!
Natali – Editor in Chief (Strategy and Mastery, AI Expert) Natali, our Editor in Chief, is the driving force behind our content’s strategic direction. With a keen eye for detail and a deep understanding of market trends, Natali ensures that our content is top-notch and strategically aligned with our client’s goals. Her expertise in AI helps to seamlessly integrate advanced technology into our marketing strategies, pushing the boundaries of conventional marketing.
-

 Email Automation1 week ago
Automated Email Marketing 101: A Beginner's Tutorial
-

 Email Warmup3 weeks ago
Warm Follow-Up Email
-

 Email Design Hub1 month ago
3 Essential Tools for Email Marketing Design Success
-

 Email Marketing2 weeks ago
What Is Email Marketing Advantages and Disadvantages
-

 Email Marketing2 weeks ago
Why Email Marketing Is Effective
-

 Email Template2 weeks ago
Crafting the Perfect Book Club Invitation Email Template
-

 Email Marketing2 weeks ago
Does Email Marketing Work in 2024
-
 Search Engine Optimization2 weeks ago
SEO Checklist: Enhance Your Site’s Performance
